
A Century of Hats: Building and Edwardian Hat

Meaghan Armstrong - Milliner/Millinery Historian

As part of my Century of Hats project, I’m recreating hats from different eras and exploring the skills and techniques used to make them. For this Edwardian build, I wanted to make a wire-frame hat, a traditional millinery technique that presents its own challenges in construction and shaping.

After I spent an inordinate amount of time looking at hats both in film and on line, I decided on what I saw in a film. It was a simple cream coloured hat that had a proportion I liked.
Then I saw an oversized straw on another film that I liked better. I thought the proportions of that one was better. I wasn’t planning on a straw hat but I wanted to use the scale of it. I always intended to make a wire frame hat as it embodies the millinery of the decade but, like every decade, there are so many to choose from.

Eventually I decided to make a hat that coordinated with a natural linen walking skirt and white lingerie cotton blouse. This outfit will also have a short jacket added to it to make a day or walking suit.
I dug through my shamefully huge fabric stash and pulled out linens, silks and a few cottons and other fabrics. I felt the silk was too fancy for a linen walking suit and even after a trip to as many fabric stores as I could manage, I ended up using the same linen as the suit. I hope I have enough to make the jacket!
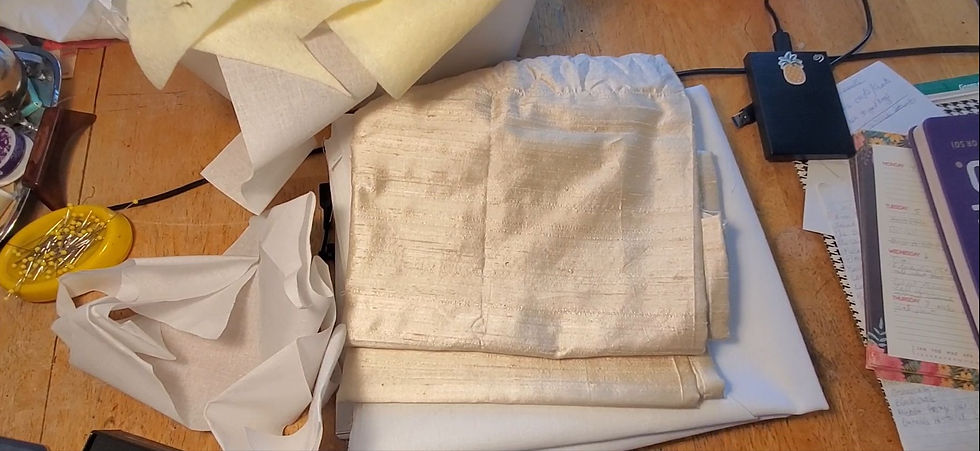
I also have a white linen gauze from the stash. That decided, I went on to draw the shape. I’ve never been one to sketch hats out in a sketch book or to make 3D drawings. I tend to figure out all the pieces I need by reverse engineering the completed hat in my head. Then I know the method I need for construction as well as which existing patterns I may have to use or to use as a starting pint to make a new pattern.

I used a boater pattern to create a large circular flat brim and used my head size. I didn’t make an oversized head size because I don’t have big hair. Even with teasing and padding it’s not going to need a bigger head size and I’m not interested in wearing a wig. I also don’t have enough hair to cover a wig or a partial wig and getting one close to my hair colour is a job for a scientist.

Not to mention, which colour? I dye over my grey and white hair and like all redheads and red dye, it stars out one colour and fades to a rather different colour before re-dying it. So what to dye a wig that can’t be fully covered? I’ve never figured it out.

I made the wire frame according to several books and millinery tradition.


The basic brim frame assembled I placed it on my head for size and was satisfied.
Then, using my paper pattern, I made a wire tip, added the side supports and assembled the brim to the crown.


At this point I was thinking that the wire frame would be covered in a swath of the linen gauze over the crown which would make the wide crown shape I was looking for without having to make a wire frame the width I needed. Boy was wrong.
While I was in the deluded idea that the width for the crown would be made through magic, I used theatrical weight buckram, cut the doughnut shape for my brim and attached it to the wire frame brim.

With the brim solid it was easier for me to see that the tall, narrow crown I made was too tall and too narrow. I didn’t have a photo of a hat that I was working from mind you. Just a collection of concepts, skills and proportions.

I took the wire crown assembly apart and lowered the crown to about 3 to 4 cm. This was a head size stand which will be the fit for my head.

I made a much larger wire tip and decided on a lower height. I made crown wires and attached them to the tip and to the brim frame. I tried it on again and somehow stumbled my way to the right shape.
The next step was covering the crown and tip with buckram. This is where my skills as a wire-work millinery frame maker were really emphasized. My uneven shape and imprecise shaping was on full display. I hoped that what was sticking out like a sore thumb would be camouflaged by the linen gauze.
I covered the entire frame, including the headstand, in a layer of polyester felt.
The felt is from my stash and the ivory colour was noticeable through the gauze when I tested it so I covered the crown and the underside of the brim in a layer of white cotton. That accomplished, I cut out and attached the linen on the top side of the brim.

I then calculated 2 to 2.5 times the outer brim measurement (the circumference) and cut out of long rectangle of linen. I didn’t sew the strip together but placed the short end down centre back and overlapped with the other short end that was folded under the seam allowance on the brim underside.

Using nearly every pin i have i spaced out the head-size gathers of the linen gauze first. The gathers would look better radiating out from the centre where they might need to be tighter together and I felt doing the head-size first would make that easier and neater.
I whipstitched the gathers down at the head-size and started spacing out and pinning the outer edge.

This was also whipstitched in place.
I realized I needed to do another whipstitch pass around to tighten up and smooth out the outer edge before attaching the bias strip.

Before I assembled and attached the linen gauze to the crown I finished the inside with cotton lining and grosgrain head-size ribbon.

The crown covering is a long rectangle, larger that the structure underneath it. I measured to the centre of the tip and across the radius and down to the brim.
Then I measured the circumference of the crown. I doubled that and added seam allowances at the long ends and folded over and pressed all edges. I ran a gathering stitch using medium to large stitches and drew up the gauze. After I secured it I stitched it to the centre of the tip and arranged the gauze around the crown overlapping the short edges. I pin-tacked in points in place and stitched at those pin points to hold the gauze in puffs.

Thus puffy look on the crown added volume to the crown to aid in the over-size crown design so popular in this decade.


I was determined to use what I had so I found 2 colours of grosgrain ribbon. One was vintage and one was modern with a bound edge. I wear brown shoes and a brown belt with the outfit so although I like the natural linen with black a stayed away from that combination. I felt it wasn’t the right fit for the era or a summer suit with a lingerie style blouse.

I fixed the feather plumes, made ribbon rosettes and long tails which I feel finish the hat beautifully.

I was and wasn’t surprised at how easy it was to make the wire frame and how difficult it was to make it smooth, even and precise. No wonder it was a skilled trade unto itself.
When i finished I wanted to make another knowing it would benefit from my mistakes and practice but, maybe another time.


I was impressed by the skill those milliners both in factories and working in a studio as I do, had. There are no factories making wire frames anymore and preservation of this skill rests on the shoulders of milliners and costumers alone. I hope I made some Edwardian milliner’s ghost at least a little proud.


Comments